
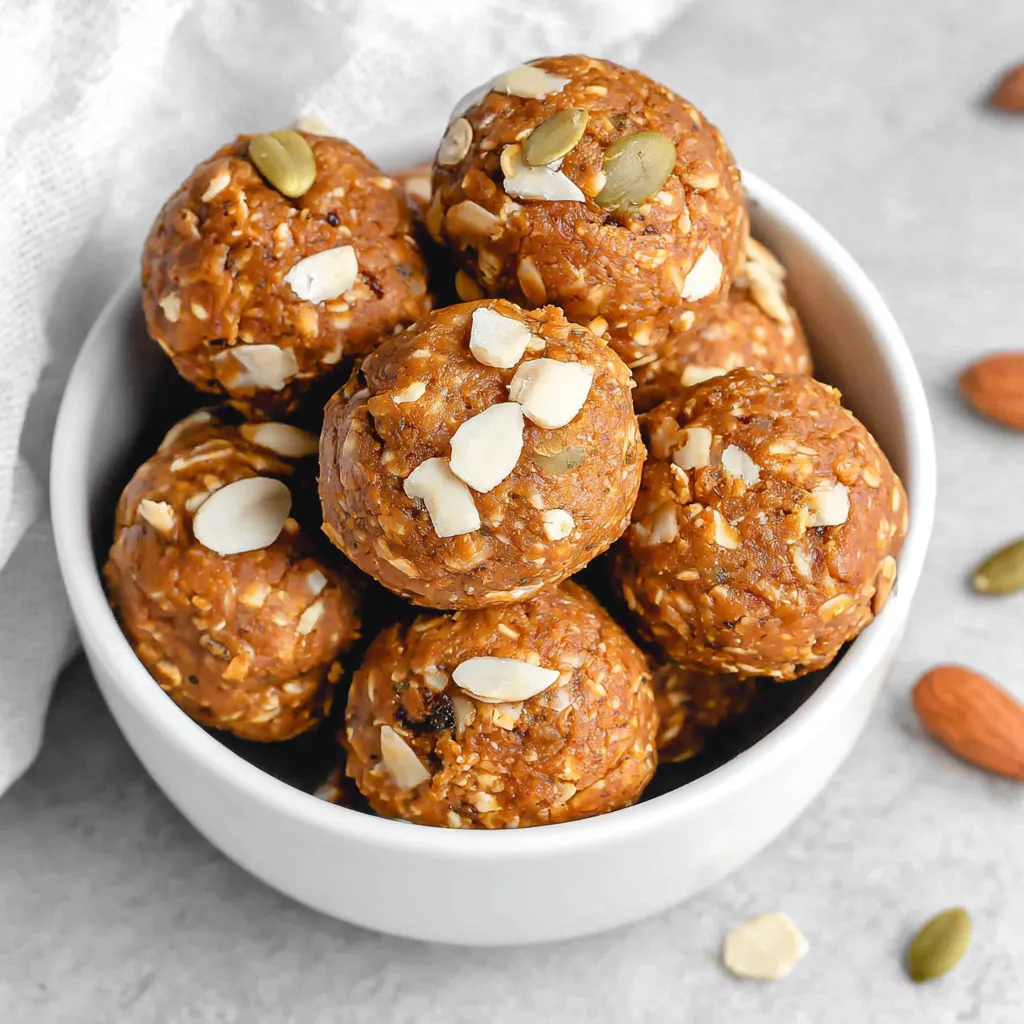
I remember the first time I tried to make protein balls. Oh, what a disaster! They were dry, crumbly, and tasted vaguely of sadness. I almost gave up entirely, but then pumpkin season rolled around, and inspiration struck. Now, I’m so excited to share my secret weapon against boring snacks: Easy 5-Ingredient Pumpkin Protein Balls, packed with flavor and so simple even a baking newbie can nail them. Today, I’m sharing all my secrets for the most amazing Easy 5-Ingredient Pumpkin Protein Balls you’ll ever make!
Why You’ll Adore These Pumpkin Protein Balls

Okay, friends, let’s talk about why these protein balls are about to become your new obsession. I’m not kidding; they’re that good!
- Insanely Easy: As the name suggests, they only require 5 ingredients. Five! That’s fewer ingredients than I use to make coffee sometimes.
- No-Bake Wonder: No oven required! This makes them perfect for those hot days when you just can’t bear to turn on the oven, or for when you’re short on time.
- Customizable: While the base recipe is amazing, you can easily tweak it to suit your taste. Think chocolate chips, chopped nuts, or even a sprinkle of sea salt!
- Healthy & Delicious: They’re packed with protein to keep you feeling full and energized, and they taste like a slice of pumpkin pie. Seriously, it’s a win-win!
- Meal Prep Friendly: These babies are perfect for meal prepping. Make a batch on Sunday and you’ll have healthy snacks ready to go all week long.
The Magical 5 Ingredients
Alright, let’s dive into the heart of the matter: the ingredients! Don’t worry; you probably already have most of these in your pantry. If not, they’re super easy to find at any grocery store.
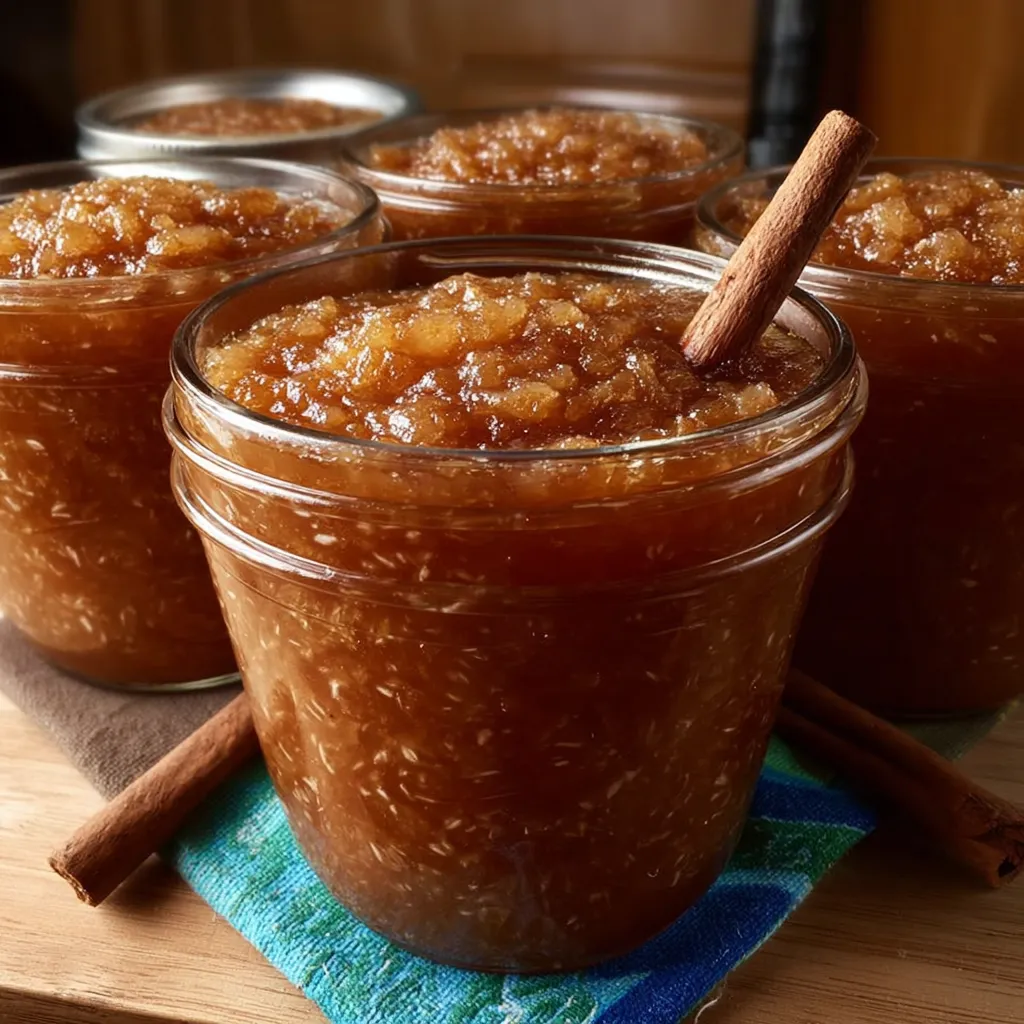
- Pumpkin Puree (Not Pumpkin Pie Filling!): This is the star of the show! Make sure you’re using 100% pure pumpkin puree, not pumpkin pie filling, which has added sugar and spices we don’t need. The puree provides that lovely pumpkin flavor and moisture.
- Protein Powder: I prefer vanilla or unflavored protein powder, but you can experiment with different flavors! Just be mindful that chocolate protein powder will change the color and flavor profile slightly. Whey, casein, or plant-based protein all work.
- Rolled Oats: These add texture and fiber to the protein balls. I recommend using rolled oats (also known as old-fashioned oats), not instant oats. Instant oats will make the balls too mushy.
- Nut Butter: Peanut butter, almond butter, cashew butter… the choice is yours! Nut butter adds healthy fats, protein, and a delicious creamy texture. Make sure your nut butter is natural, meaning it only contains nuts and maybe a little salt.
- Pumpkin Pie Spice: This blend of cinnamon, nutmeg, ginger, and cloves is what gives these protein balls that classic pumpkin pie flavor. If you don’t have pumpkin pie spice, you can make your own by combining those individual spices.
Let’s Get Rolling: Step-by-Step Instructions
Okay, friend, here’s where the magic happens! Don’t be intimidated; this recipe is so simple, I promise you can’t mess it up (well, almost!). Follow these steps, and you’ll be enjoying delicious pumpkin protein balls in no time.
Step 1: Gather Your Supplies
Before you start, make sure you have all your ingredients measured out and ready to go. This will make the process much smoother and prevent any mid-recipe scrambling. You’ll also need a large mixing bowl, a measuring cup, measuring spoons, and a baking sheet lined with parchment paper (or wax paper). Don’t forget a spoon or spatula for mixing!
Step 2: Mix It Up!
In your large mixing bowl, combine the pumpkin puree, protein powder, rolled oats, nut butter, and pumpkin pie spice. Now, get ready to get your hands dirty (or use a spoon, if you prefer!). Mix everything together until it’s well combined. Don’t be afraid to really get in there and work it! You want to make sure all the ingredients are evenly distributed.
Pro Tip: If the mixture seems too dry, add a tablespoon of water or milk (dairy or non-dairy) at a time until it reaches the desired consistency. If it’s too wet, add a tablespoon of protein powder or rolled oats.
Step 3: Roll ‘Em Out
Now comes the fun part: rolling the protein balls! Using your hands (or a small cookie scoop for more uniform sizes), scoop out about a tablespoon of the mixture and roll it into a ball. Place the ball on the prepared baking sheet. Repeat this process until you’ve used up all the mixture.
Don’t worry if the dough looks a little sticky—that’s normal! You can lightly wet your hands with water to prevent the mixture from sticking too much.
Step 4: Chill Out
Once you’ve rolled all the protein balls, place the baking sheet in the refrigerator for at least 30 minutes. This will allow the balls to firm up and prevent them from being too sticky. Trust me, this step is important!
Step 5: Enjoy!
After the protein balls have chilled, they’re ready to eat! Store them in an airtight container in the refrigerator for up to a week. Or, if you’re like me, they’ll be gone within a day or two. These are absolutely perfect for a post-workout snack, an afternoon pick-me-up, or even a healthy dessert.
Variations and Add-Ins: Let’s Get Creative!
Okay, now that you’ve mastered the basic recipe, let’s talk about how to customize these protein balls to your liking! The possibilities are endless, so don’t be afraid to experiment and get creative. Here are a few of my favorite variations:
- Chocolate Chip Pumpkin Protein Balls: Add 1/4 cup of mini chocolate chips to the mixture. I prefer dark chocolate, but you can use any kind you like!
- Nutty Pumpkin Protein Balls: Add 1/4 cup of chopped nuts, such as walnuts, pecans, or almonds, to the mixture. This adds a nice crunch and extra flavor.
- Coconut Pumpkin Protein Balls: Roll the finished protein balls in shredded coconut. This adds a touch of sweetness and a lovely texture.
- Maple Pumpkin Protein Balls: Add 1-2 tablespoons of maple syrup to the mixture for a touch of extra sweetness and a hint of maple flavor.
- Spice It Up: Experiment with different spices! Try adding a pinch of ground ginger, cloves, or cardamom for a unique flavor twist.
- Seed Power: Add chia seeds, flax seeds, or hemp seeds for an extra boost of nutrients and a slight crunch.
- Dried Fruit Delight: Mix in some chopped dried cranberries, raisins, or apricots for a chewy and sweet addition.
Troubleshooting Tips: Because Life Happens!
Even with the simplest recipes, sometimes things don’t go exactly as planned. Don’t worry; I’m here to help! Here are a few common problems and how to fix them:
- Protein balls are too dry: Add a tablespoon of water or milk (dairy or non-dairy) at a time until they reach the desired consistency. You can also add a little more pumpkin puree or nut butter.
- Protein balls are too wet: Add a tablespoon of protein powder or rolled oats at a time until they firm up. You can also try chilling them for a longer period of time.
- Protein balls are too sticky: Lightly wet your hands with water before rolling them. You can also chill them for a longer period of time to help them firm up.
- Protein balls don’t taste like pumpkin: Make sure you’re using pumpkin puree, not pumpkin pie filling. Also, be generous with the pumpkin pie spice!
- Protein powder is too overpowering: Use an unflavored protein powder, or try reducing the amount of protein powder and adding more rolled oats.
Storing Your Pumpkin Protein Balls
Once you’ve made your amazing pumpkin protein balls, you’ll want to store them properly to keep them fresh and delicious. Here are a few tips:
- Refrigeration: Store the protein balls in an airtight container in the refrigerator for up to a week. They’ll stay fresh and delicious.
- Freezing: You can also freeze the protein balls for longer storage. Place them in a freezer-safe bag or container and they’ll keep for up to 2-3 months. When you’re ready to eat them, simply thaw them in the refrigerator or at room temperature.
- Bring them on the Go: Pack a few in a small container for a perfect portable snack at work, at the gym, or on a hike.
The Final Verdict: Are These Worth It?
Are these Easy 5-Ingredient Pumpkin Protein Balls worth the effort? Absolutely, positively, 100% yes! They’re easy to make, incredibly delicious, and packed with healthy ingredients. They’re the perfect snack for busy days, a healthy dessert alternative, or a post-workout boost. Plus, they’re so customizable, you can create endless variations to suit your taste.
I truly believe that these protein balls will become a staple in your kitchen, just like they have in mine. So, what are you waiting for? Go grab your ingredients and get rolling! You won’t regret it. And, as always, if you make these, please let me know! Tag me in your photos on social media – I can’t wait to see your creations! Happy baking (well, no-baking)!
What’s the difference between pumpkin puree and pumpkin pie filling, and why is it important for this recipe?
Pumpkin puree is 100% pure pumpkin, while pumpkin pie filling has added sugar and spices. The recipe calls for puree because it allows you to control the sweetness and spice levels, ensuring the protein balls aren’t overly sweet or have unwanted spices.
What can I do if the protein ball mixture is too dry or too wet?
If the mixture is too dry, add a tablespoon of water or milk (dairy or non-dairy) at a time until it reaches the desired consistency. If it’s too wet, add a tablespoon of protein powder or rolled oats.
How should I store the pumpkin protein balls to keep them fresh?
Store the protein balls in an airtight container in the refrigerator for up to a week. You can also freeze them in a freezer-safe bag or container for up to 2-3 months, then thaw them in the refrigerator or at room temperature when you’re ready to eat them.
What are some variations or add-ins I can use to customize these pumpkin protein balls?
You can add mini chocolate chips, chopped nuts (walnuts, pecans, or almonds), shredded coconut, maple syrup, or different spices like ginger, cloves, or cardamom. Seeds like chia, flax, or hemp, as well as dried fruit like cranberries, raisins, or apricots, can also be added.
Easy 5-Ingredient Pumpkin Protein Balls
Ingredients
Equipment
Method
- Gather all ingredients and equipment.
- Line a baking sheet with parchment paper or wax paper.
- In a large mixing bowl, combine the pumpkin puree, protein powder, rolled oats, nut butter, and pumpkin pie spice.
- Mix all ingredients together until well combined. If the mixture is too dry, add water or milk, one tablespoon at a time, until the desired consistency is reached. If the mixture is too wet, add more protein powder or rolled oats, one tablespoon at a time.
- Using your hands or a small cookie scoop, scoop out about a tablespoon of the mixture and roll it into a ball.
- Place the ball on the prepared baking sheet.
- Repeat until all the mixture is used.
- Place the baking sheet in the refrigerator for at least 30 minutes to allow the balls to firm up.
- Enjoy chilled!

")