
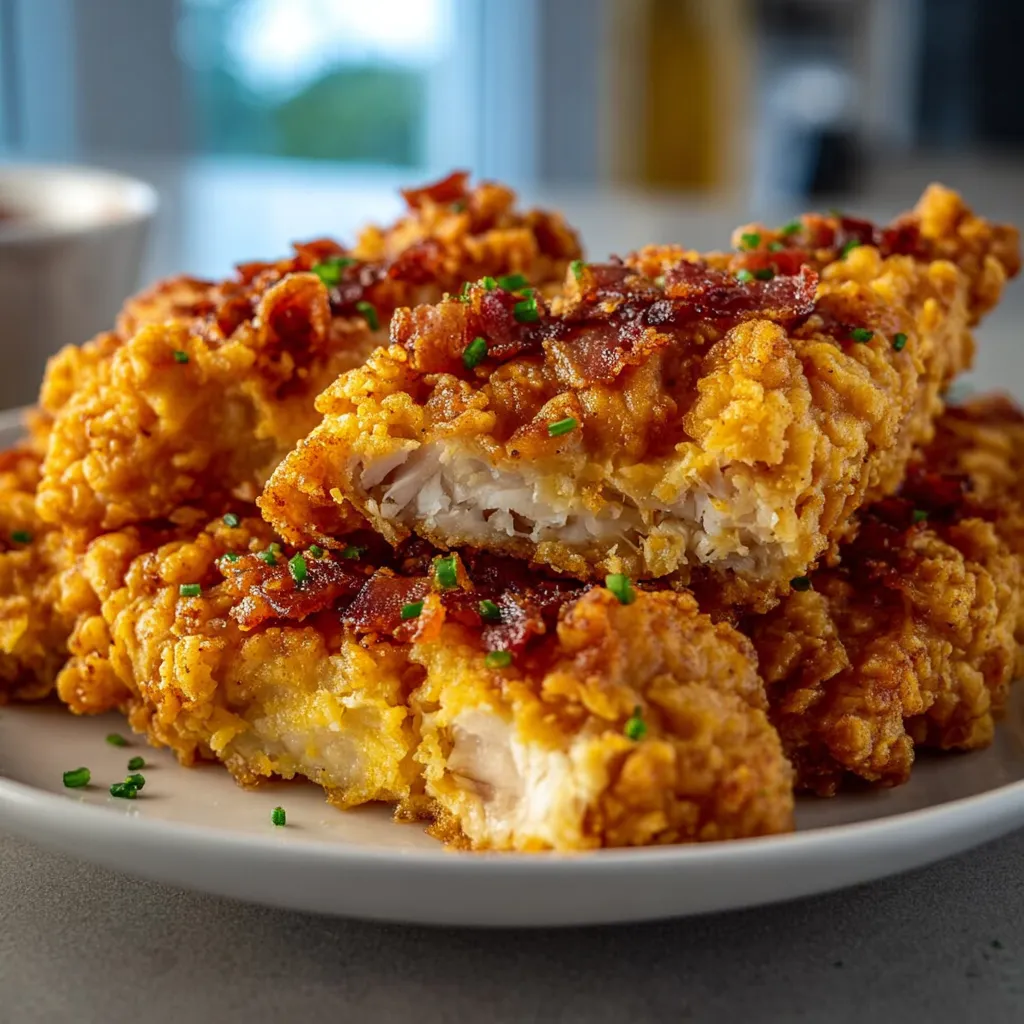
I can still remember the excitement bubbling inside me the first time I ever attempted making fried chicken. It was for a family picnic, and the pressure was on to deliver something truly memorable. The chicken turned out… well, let’s just say it wasn’t my finest hour. It was bland, the coating was soggy, and everyone politely picked at it. But that experience fueled a relentless pursuit of the perfect fried chicken – a quest that led me to these unbelievably delicious Crave-Worthy Crispy Buttermilk Chicken Strips. Today, I’m sharing all my secrets for the most amazing, golden, and utterly irresistible chicken strips you’ll ever make!
The Secret’s in the Soak: Why Buttermilk is King

Alright, let’s talk about the star of the show: buttermilk! You might be wondering, “Why buttermilk? Can’t I just use regular milk?” Well, you *could*, but trust me, you’d be missing out on some serious flavor and tenderness. Buttermilk isn’t just a liquid; it’s a magical elixir that transforms ordinary chicken into something extraordinary. Here’s why:
- Tenderizing Power: The acidity in buttermilk helps to break down the proteins in the chicken, resulting in incredibly tender and juicy strips. Think of it as a gentle massage for your chicken!
- Flavor Infusion: Buttermilk has a slightly tangy flavor that penetrates deep into the chicken, adding a subtle zest that complements the spices perfectly.
- Coating Adhesion: The buttermilk creates a slightly sticky surface that helps the breading adhere like a dream, ensuring a thick, crispy crust. No more sad, patchy chicken!
If you don’t have buttermilk on hand, don’t panic! You can easily make a substitute by adding 1 tablespoon of lemon juice or white vinegar to 1 cup of regular milk. Let it sit for about 5-10 minutes, and voila! You’ve got a decent stand-in. But honestly, for the best results, I always recommend using real buttermilk if you can get your hands on it.
Choosing Your Chicken
The quality of your chicken matters. I always opt for boneless, skinless chicken breasts, but you can also use chicken thighs if you prefer a richer flavor. Cut the chicken into strips that are about 1-inch thick and 3-4 inches long. This ensures they cook evenly and are the perfect size for dipping and devouring!
Building the Flavor Fortress: The Breading
The breading is where the magic truly happens! This isn’t just about coating the chicken; it’s about creating layers of flavor and texture that will send your taste buds into overdrive. Here’s my secret weapon:
- Flour Power: All-purpose flour forms the base of our breading.
- Spice it Up!: This is where you get to customize your chicken strips. I like to use a blend of paprika, garlic powder, onion powder, black pepper, cayenne pepper (for a little kick!), and dried oregano. Don’t be afraid to experiment and find your perfect flavor combination!
- The Starch Secret: Adding a bit of cornstarch to the flour mixture is the key to achieving that ultra-crispy texture. It helps to absorb moisture and create a lighter, more delicate crust.
- Double Dip Drama (Optional, But Recommended!): For an extra thick and crispy coating, you can double dip the chicken in the buttermilk and breading. It’s a bit more work, but the results are totally worth it!
Pro Tip: Make sure to season your flour mixture generously! Remember, this is where most of the flavor comes from, so don’t be shy with the spices.
The Perfect Breading Technique
Here’s how I achieve that perfect, even coating every single time:
- Set up a Breading Station: You’ll need three shallow dishes: one for the buttermilk, one for the flour mixture, and an empty plate to place the breaded chicken strips.
- Dry Hands, Wet Hands: Use one hand to dip the chicken in the buttermilk (your “wet” hand) and the other hand to dredge it in the flour mixture (your “dry” hand). This prevents your fingers from getting coated in a sticky mess.
- Press, Don’t Pat: When dredging the chicken in the flour, press the flour firmly onto the chicken to ensure it adheres properly. Don’t just pat it on lightly.
- Shake Off Excess: After breading, shake off any excess flour to prevent the oil from getting too dirty during frying.
- Resting Period: Place the breaded chicken strips on a wire rack and let them rest for about 10-15 minutes before frying. This helps the breading to set and adhere even better.
The Golden Rule: Frying Like a Pro
Frying can be intimidating, but don’t worry! I’m here to guide you through it. With a few simple tips and tricks, you’ll be frying up golden, crispy chicken strips like a seasoned pro in no time.
- Oil Choice Matters: Use a high-heat oil like canola oil, vegetable oil, or peanut oil. These oils have a high smoke point, which means they can withstand high temperatures without burning.
- Temperature is Key: The ideal frying temperature is between 325°F and 350°F (160°C and 175°C). Use a deep-fry thermometer to monitor the temperature. If the oil is too cold, the chicken will be greasy. If it’s too hot, the chicken will burn on the outside before it’s cooked through on the inside.
- Don’t Overcrowd the Pan: Fry the chicken in batches to avoid overcrowding the pan, which will lower the oil temperature and result in soggy chicken.
- Turn Occasionally: Use tongs to turn the chicken strips occasionally to ensure they cook evenly on all sides.
- Golden Brown Perfection: Fry the chicken for about 6-8 minutes, or until it’s golden brown and cooked through. The internal temperature should reach 165°F (74°C).
- Drain the Excess: Place the fried chicken strips on a wire rack lined with paper towels to drain off any excess oil.
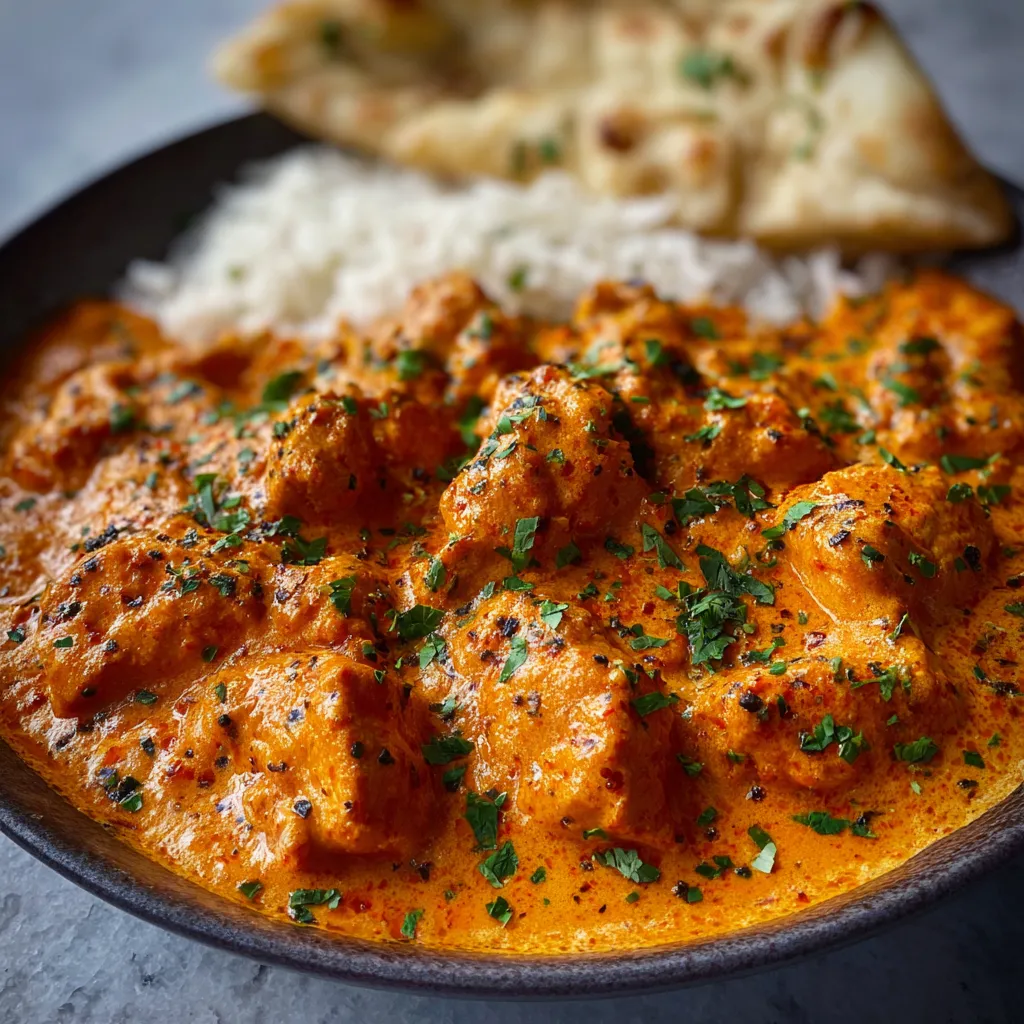
While you’re at it, you can easily prepare a delicious BUTTER CHICKEN recipe to pair with some naan bread for an alternative meal option.
Troubleshooting Tips for Perfect Frying
- Chicken is Burning Too Quickly: Lower the heat slightly.
- Chicken is Greasy: The oil temperature is too low. Increase the heat and make sure the oil is hot enough before adding more chicken.
- Breading is Falling Off: Make sure you’re pressing the flour firmly onto the chicken and letting it rest before frying.
Baking as an Alternative: Healthier Crispy Chicken
If you’re looking for a healthier alternative to frying, you can definitely bake these chicken strips! While they won’t be *quite* as crispy as the fried version, they’ll still be incredibly delicious and satisfying.
- Preheat Your Oven: Preheat your oven to 400°F (200°C).
- Prepare a Baking Sheet: Line a baking sheet with parchment paper and lightly spray it with cooking spray.
- Bake to Perfection: Place the breaded chicken strips on the baking sheet and bake for about 20-25 minutes, or until they’re golden brown and cooked through. Flip them halfway through to ensure even cooking.
For extra crispiness when baking, try spraying the breaded chicken strips with cooking spray before putting them in the oven. You can also try baking them on a wire rack placed on top of the baking sheet, which allows air to circulate around the chicken and promotes even crisping.
Sauce It Up! The Perfect Dipping Companions
No chicken strip is complete without a delicious dipping sauce! Here are some of my all-time favorite dipping sauces to pair with these crispy buttermilk chicken strips:
- Classic Ranch: A timeless favorite that everyone loves.
- Honey Mustard: Sweet, tangy, and oh-so-addictive!
- BBQ Sauce: Smoky and savory, perfect for a more robust flavor.
- Spicy Mayo: A creamy and fiery kick that will wake up your taste buds.
- Sweet Chili Sauce: A delightful blend of sweet, spicy, and tangy flavors.
Don’t be afraid to get creative and experiment with different sauces! You can even make your own homemade dipping sauces to really impress your friends and family. Maybe even whip up some of that Bang Bang Chicken Bowl sauce and see how that tastes with these crispy chicken strips!
Make it a Meal: Serving Suggestions
These Crave-Worthy Crispy Buttermilk Chicken Strips are incredibly versatile and can be served in so many different ways! Here are a few ideas to get you started:
- Classic Chicken and Fries: Serve them with a side of crispy french fries and your favorite dipping sauce for a classic and satisfying meal.
- Chicken Strip Salad: Top a bed of mixed greens with these chicken strips, your favorite veggies, and a light vinaigrette for a healthier option.
- Chicken Strip Wraps: Wrap them in tortillas with lettuce, tomato, cheese, and your favorite sauce for a quick and easy lunch or dinner.
- Chicken Strip Sliders: Serve them on mini buns with coleslaw and pickles for a fun and flavorful appetizer.
- Chicken & Waffles: For a sweet and savory treat, try serving these chicken strips alongside waffles and drizzled with maple syrup.
For a lighter option, try the Chicken & Avocado Salad Bowl. Or, for something a little heartier, you could try the HONEY PEPPER CHICKEN PASTA which is always a crowd-pleaser!
Storing and Reheating: Keeping the Crispy Alive
If you happen to have any leftover chicken strips (which is unlikely!), here’s how to store and reheat them to maintain their crispy texture:
- Storing: Let the chicken strips cool completely before storing them in an airtight container in the refrigerator. They’ll keep for up to 3-4 days.
- Reheating: The best way to reheat these chicken strips and maintain their crispiness is in the oven. Preheat your oven to 350°F (175°C) and place the chicken strips on a wire rack on a baking sheet. Bake for about 10-15 minutes, or until they’re heated through and crispy again. You can also reheat them in an air fryer for even crispier results.
Microwaving is not recommended as it will make the chicken strips soggy.
Don’t forget to check out the Forgotten Chicken and Rice Casserole for another easy chicken-based weeknight dinner option.
Or how about the Spicy Chicken Rigatoni? A great meal for those who like a bit of a kick!
With these tips, you will always have crispy leftovers to enjoy!
Conclusion: Crispy Chicken Confidence!
So there you have it! My complete guide to making the most irresistible Crave-Worthy Crispy Buttermilk Chicken Strips. From the buttermilk marinade to the perfectly seasoned breading and the golden-brown frying (or baking!) technique, you now have all the tools you need to create chicken strips that will rival any restaurant version. Go forth, experiment, and enjoy the deliciousness! I know you’ll absolutely nail it, and your family and friends will thank you for it!
Why is buttermilk important for making the best chicken strips?
Buttermilk tenderizes the chicken, infuses it with a tangy flavor, and helps the breading adhere properly, resulting in a thick, crispy crust.
What is the secret to achieving an ultra-crispy texture in the breading?
Adding cornstarch to the flour mixture helps absorb moisture and creates a lighter, more delicate crust, resulting in an ultra-crispy texture.
What is the ideal oil temperature for frying the chicken strips, and why is it important?
The ideal frying temperature is between 325°F and 350°F (160°C and 175°C). If the oil is too cold, the chicken will be greasy; if it’s too hot, the chicken will burn on the outside before it’s cooked through.
How do you reheat leftover chicken strips to maintain their crispiness?
Reheat the chicken strips in the oven at 350°F (175°C) on a wire rack on a baking sheet for 10-15 minutes, or until heated through. An air fryer can also be used for even crispier results. Microwaving is not recommended as it will make the chicken strips soggy.
Best Buttermilk Chicken Strips
Ingredients
Equipment
Method
- In a large bowl, soak the chicken strips in buttermilk for at least 30 minutes, or up to 4 hours in the refrigerator.
- In a shallow dish, whisk together the flour, cornstarch, paprika, garlic powder, onion powder, black pepper, cayenne pepper (if using), oregano, and salt.
- Set up a breading station with the buttermilk-soaked chicken, the flour mixture, and an empty plate for the breaded chicken.
- Using one hand for wet and one hand for dry, dip each chicken strip into the flour mixture, pressing to coat thoroughly.
- Shake off excess flour and place the breaded chicken strips on a wire rack.
- Let the breaded chicken strips rest for 10-15 minutes to allow the breading to adhere.
- Heat vegetable oil in a frying pan or deep fryer to 325-350°F (160-175°C).
- Carefully add the chicken strips to the hot oil in batches, being careful not to overcrowd the pan.
- Fry for 6-8 minutes, or until golden brown and cooked through, turning occasionally.
- The internal temperature should reach 165°F (74°C).
- Remove the chicken strips from the oil and place them on a wire rack lined with paper towels to drain excess oil.
- Serve immediately with your favorite dipping sauces.
- For baking: Preheat oven to 400°F (200°C). Line a baking sheet with parchment paper and spray with cooking spray.
- Place breaded chicken strips on the prepared baking sheet.
- Bake for 20-25 minutes, flipping halfway through, or until golden brown and cooked through.

")